Title here
Summary here
Learn how to install PostgreSQL 14 on Windows with the official installer, including configuration, pgAdmin setup, and verification
In this guide, you’ll learn how to install PostgreSQL 14.7 on Windows 10.
The process is straightforward and consists of the following steps:
Note: We recommend version 14.7 because it is commonly used. There are newer versions available, but their features vary substantially!
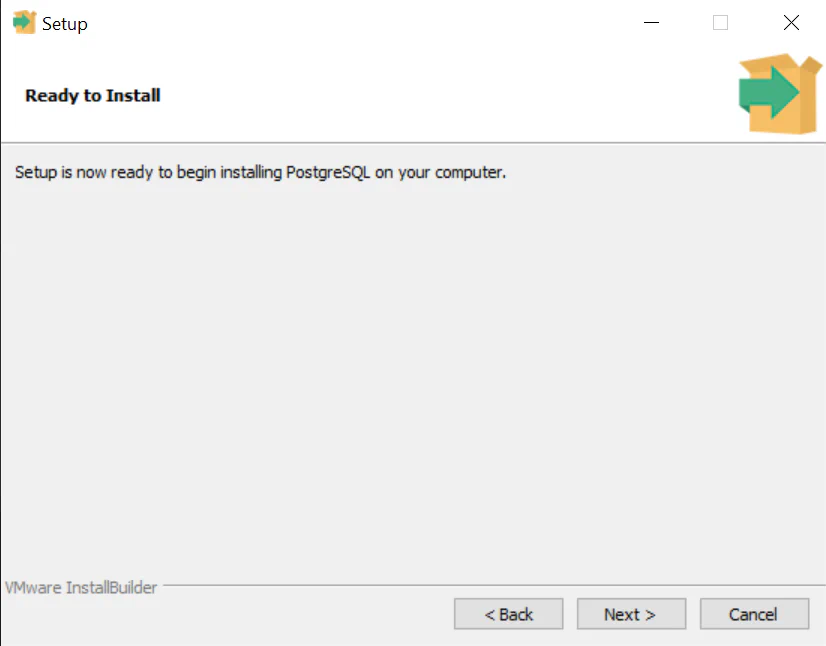
We’re about to initiate a vital part of this project - installing and configuring PostgreSQL.
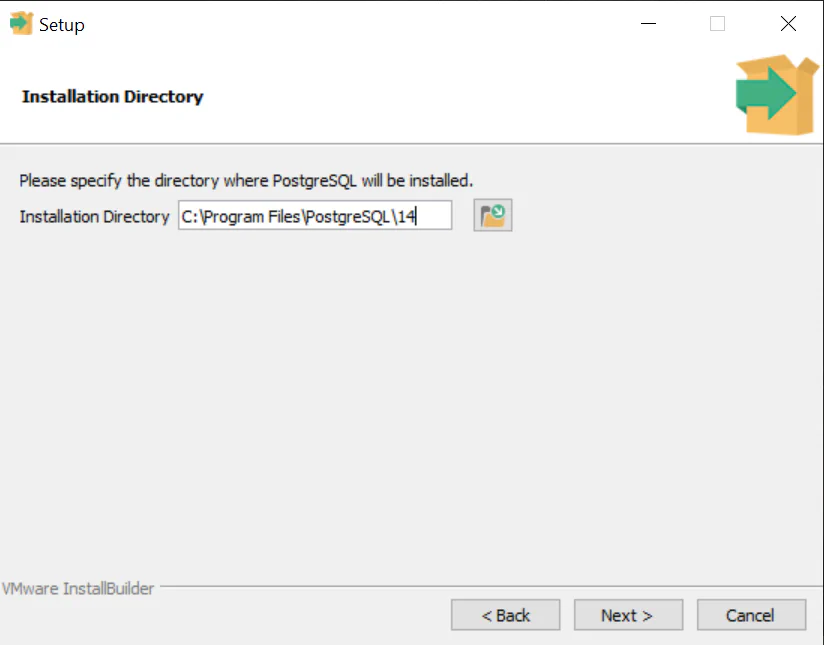
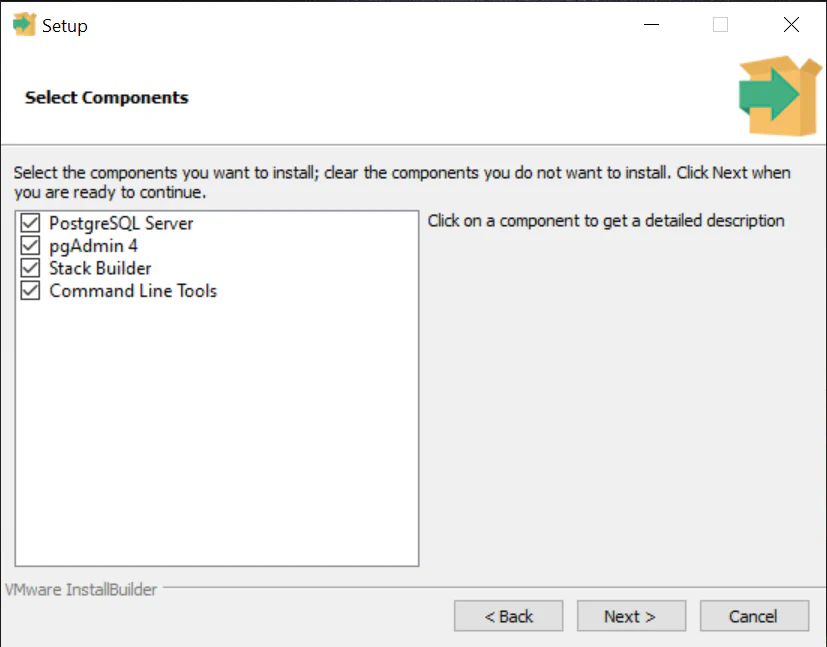
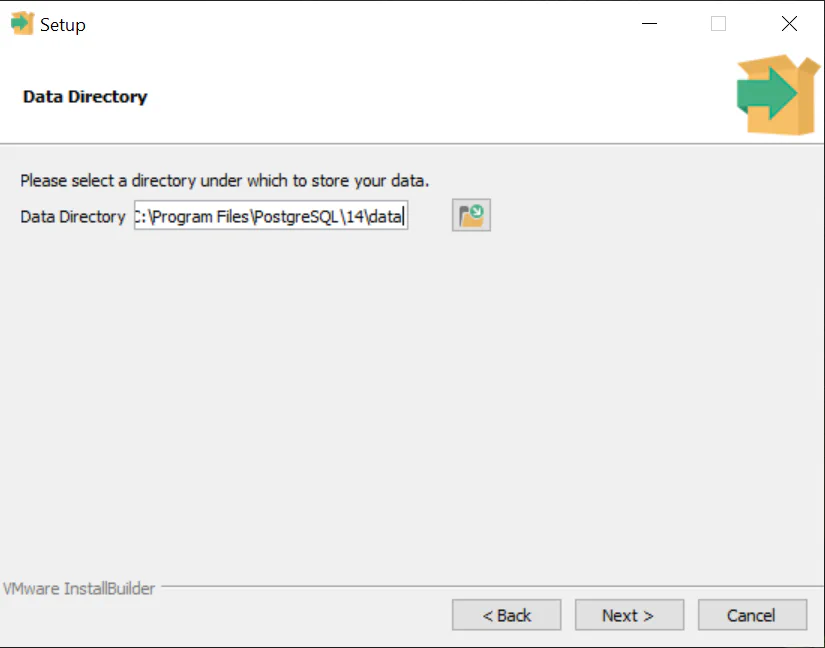
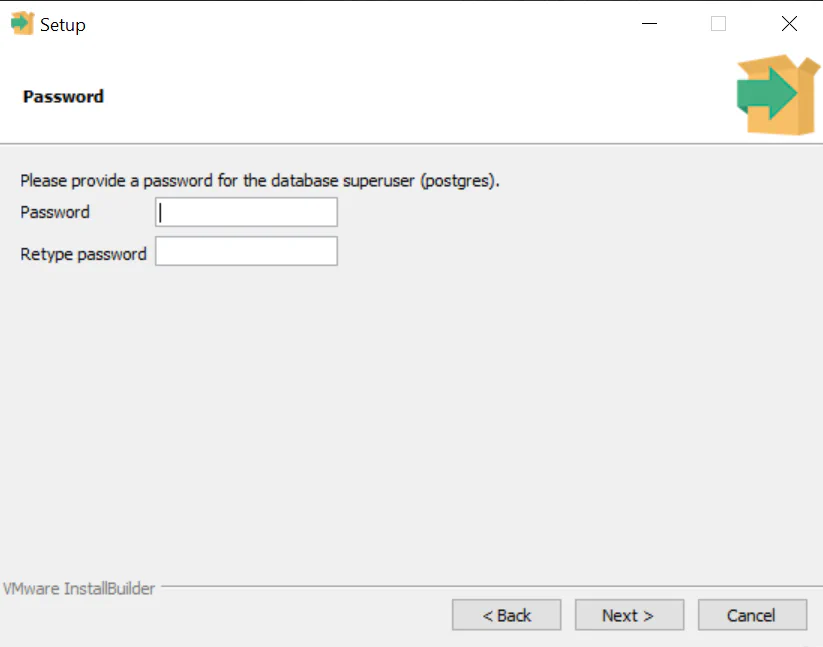
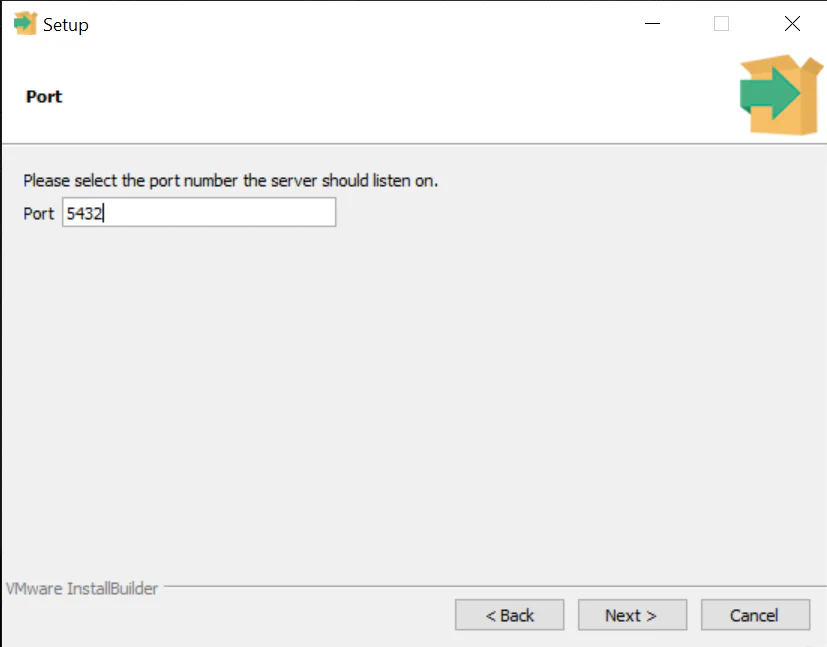
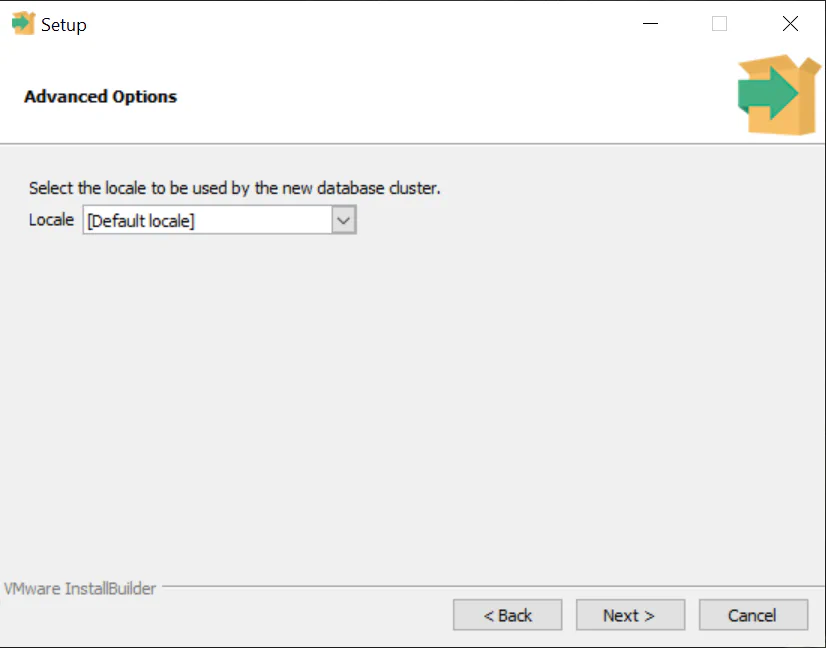
Throughout this process, you’ll define critical settings like the installation directory, components, data directory, and the initial ‘postgres’ user password. This password grants administrative access to your PostgreSQL system. Additionally, you’ll choose the default port for connections and the database cluster locale.
Each choice affects your system’s operation, file storage, available tools, and security. We’re here to guide you through each decision to ensure optimal system functioning.

Next, we’re going to configure environment variables on your Windows system. Why are we doing this? Well, environment variables are a powerful feature of operating systems that allow us to specify values - like directory locations - that can be used by multiple applications. In our case, we need to ensure that our system can locate the PostgreSQL executable files stored in the “bin” folder of the PostgreSQL directory.
By adding the PostgreSQL “bin” folder path to the system’s PATH environment variable, we’re telling our operating system where to find these executables. This means you’ll be able to run PostgreSQL commands directly from the command line, no matter what directory you’re in, because the system will know where to find the necessary files. This makes working with PostgreSQL more convenient and opens up the possibility of running scripts that interact with PostgreSQL.
Now, let’s get started with the steps to configure your environment variables on Windows!
C:\Program Files\PostgreSQL\14\bin.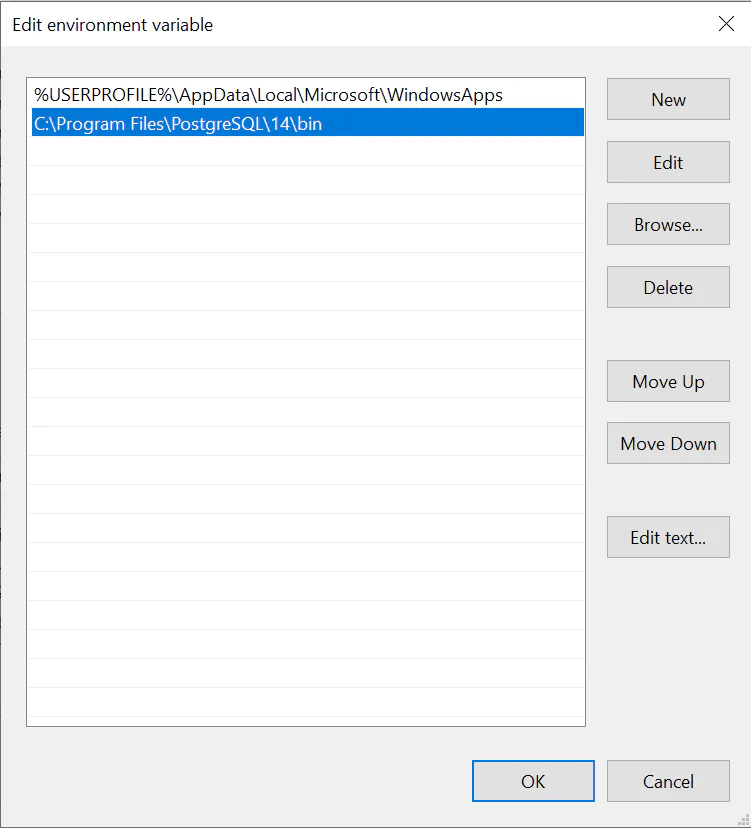
After going through the installation and configuration process, it’s essential to verify that PostgreSQL is correctly installed and accessible. This gives us the assurance that the software is properly set up and ready to use, which can save us from troubleshooting issues later when we start interacting with databases.
If something went wrong during installation, this verification process will help you spot the problem early before creating or managing databases.
Now, let’s go through the steps to verify your PostgreSQL installation.
psql --version and press Enter. You should see the PostgreSQL version number you installed if the installation was successful.psql -U postgres and press Enter.postgres=# prompt, indicating you are connected to the PostgreSQL server.Now, we’re going to introduce you to the Northwind database and help you download it. The Northwind database is a sample database originally provided by Microsoft for its Access Database Management System. It’s based on a fictitious company named “Northwind Traders,” and it contains data on their customers, orders, products, suppliers, and other aspects of the business. In our case, we’ll be working with a version of Northwind that has been adapted for PostgreSQL.
The following steps will guide you on how to download this PostgreSQL-compatible version of the Northwind database from GitHub to your local machine. Let’s get started:
First, you need to download a version of the Northwind database that’s compatible with PostgreSQL. You can find an adapted version on GitHub. To download the SQL file, follow these steps:
Open your Terminal application.
Create a new directory for the Northwind database and navigate to it:
mkdir northwind && cd northwindDownload the Northwind PostgreSQL SQL file using curl:
curl -O https://raw.githubusercontent.com/pthom/northwind_psql/master/northwind.sqlThis will download the northwind.sql file to the northwind directory you created.
Now that we’ve downloaded the Northwind SQL file, it’s time to prepare our PostgreSQL server to host this data. The next steps will guide you in creating a new database on your PostgreSQL server, a crucial prerequisite before importing the Northwind SQL file.
Creating a dedicated database for the Northwind data is good practice as it isolates these data from other databases in your PostgreSQL server, facilitating better organization and management of your data. These steps involve connecting to the PostgreSQL server as the postgres user, creating the northwind database, and then exiting the PostgreSQL command-line interface.
Let’s proceed with creating your new database:
Connect to the PostgreSQL server as the postgres user:
psql -U postgresCreate a new database called northwind:
CREATE DATABASE northwind;Exit the psql command-line interface:
\qWe’re now ready to import the Northwind SQL file into our newly created northwind database. This step is crucial as it populates our database with the data from the Northwind SQL file, which we will use for our PostgreSQL learning journey.
These instructions guide you through the process of ensuring you’re in the correct directory in your Terminal and executing the command to import the SQL file. This command will connect to the PostgreSQL server, target the northwind database, and run the SQL commands contained in the northwind.sql file.
Let’s move ahead and breathe life into our northwind database with the data it needs!
With the northwind database created, you can import the Northwind SQL file using psql. Follow these steps:
In your Terminal, ensure you’re in the northwind directory where you downloaded the northwind.sql file.
Run the following command to import the Northwind SQL file into the northwind database:
psql -U postgres -d northwind -f northwind.sqlThis command connects to the PostgreSQL server as the postgres user, selects the northwind database, and executes the SQL commands in the northwind.sql file.
You’ve successfully created your northwind database and imported the Northwind SQL file. Next, we must ensure everything was installed correctly, and our database is ready for use.
These upcoming steps will guide you on connecting to your northwind database, listing its tables, running a sample query, and finally, exiting the command-line interface. Checking the tables and running a sample query will give you a sneak peek into the data you now have and verify that the data was imported correctly. This means we can ensure everything is in order before diving into more complex operations and analyses.
To verify that the Northwind database has been installed correctly, follow these steps:
Connect to the northwind database using psql:
psql -U postgres -d northwindList the tables in the Northwind database:
\dtYou should see a list of Northwind tables: categories, customers, employees, orders, and more.
Run a sample query to ensure the data has been imported correctly. For example, you can query the customers table:
SELECT * FROM customers LIMIT 5;This should return the first five rows from the customers table.
Exit the psql command-line interface:
\qCongratulations! You’ve successfully installed the Northwind database in PostgreSQL using an SQL file and psql.
As we wrap up our installation, we will now introduce Jupyter Notebook as one of the tools available for executing SQL queries and analyzing the Northwind database. Jupyter Notebook offers a convenient and interactive platform that simplifies the visualization and sharing of query results, but it’s important to note that it is an optional step. You can also access Postgres through other means. However, we highly recommend using Jupyter Notebook for its numerous benefits and enhanced user experience.
To set up the necessary tools and establish a connection to the Northwind database, here is an overview of what each step will do:
!pip install ipython-sql: This command installs the ipython-sql package. This package enables you to write SQL queries directly in your Jupyter Notebook, making it easier to execute and visualize the results of your queries within the notebook environment.
%sql postgresql://postgres@localhost:5432/northwind: This command establishes a connection to the Northwind database using the PostgreSQL database system. The connection string has the following format:
postgresql://username@hostname:port/database_nameIn this case, username is postgres, hostname is localhost, port is 5432, and database_name is northwind. The %sql magic command allows you to run a single-line SQL query in the Jupyter Notebook.
Copy the following text into a code cell in the Jupyter Notebook:
!pip install ipython-sql
%load_ext sql
%sql postgresql://postgres@localhost:5432/northwind
On Windows you may need to try the following command because you need to provide the password you set for the “postgres” user during installation:
%sql postgresql://postgres:{password}@localhost:5432/northwindBear in mind that it’s considered best practice not to include sensitive information like passwords directly in files that could be shared or accidentally exposed. Instead, you can store your password securely using environment variables or a password management system (we’ll link to some resources at the end of this guide if you are interested in doing this).
Shift + Enter or Ctrl + Enter.Upon successful connection, you should see an output similar to the following:
'Connected: postgres@northwind'This output confirms that you are now connected to the Northwind database, and you can proceed with the guided project in your Jupyter Notebook environment.
Once you execute these commands, you’ll be connected to the Northwind database, and you can start writing SQL queries in your Jupyter Notebook using the %sql or %%sql magic commands.
Based on what you’ve accomplished, here are some potential next steps to continue your learning journey:
psycopg2, a popular PostgreSQL adapter for Python, to interact with your database programmatically.SQLAlchemy to manage your database using Python..env files for environment variables.